Automated Door Opener
Group 2
Christopher McNeill, Joy Biswas, Michal Bogusz, Karim Toufiq
ENGL 21007: Writing for Engineers
Professor Sara Jacobson
May 4, 2020
Abstract
The recent pandemic that has turned our lives upside down inspired us to think of an idea that could help slow or prevent virus transmission between people. During a pandemic, it is key to promote safe distancing between people but also safe distancing from surfaces that people come into contact with. Our solution is a hands-free automated door, which uses sensors to operate. This is unlike automated doors that require a button to be pushed, because it allows the user not to touch the same surface that many hands have touched before them. This takes away a major source of germ and virus transmission and allows us to use public areas in a safer manner.
Outline of Contents:
- Overview
- Components of Automated Door Opener & their functionalities
- Door Opening Mechanism
- System Block Diagram
- Control Flow Diagram
- Processes
Overview:
Our Automated Door Opener is a product which uses automation with the help of technology in order to open a door. The overall concept of this innovation is to open a door by triggering a sensor when a person puts his feet near the sensor which activates the motor that opens the door. This can be done from both sides of the door.
Components of Automated Door Opener & their functionalities:
Our Automated Door Opener consists of seven components. They are –

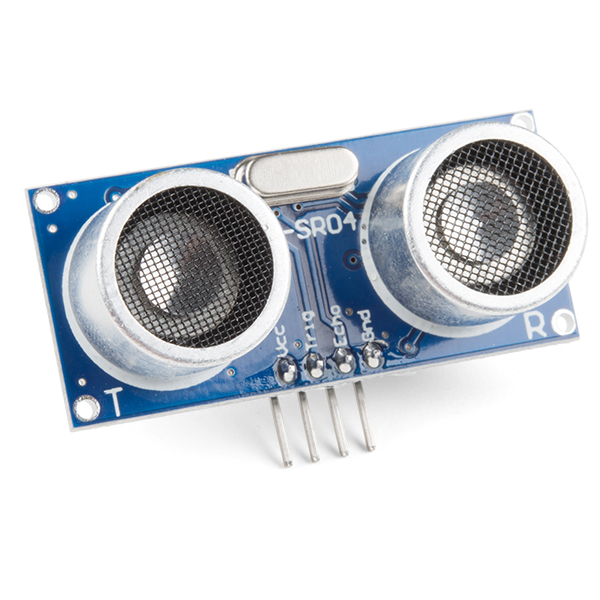
Ultrasonic Sensor HC-SR04:
This sensor can provide from 2cm up to 400cm of contact-free measurement functionality with a ranging accuracy that can reach up to 3mm. It consists of three components such as – Ultrasonic receiver, Transmitter, Control Circuit.

There are four pins in this sensor such as: Trig (Trigger), GND (Ground), Echo (Receiver) and VCC (Power). All these pins need to be connected to the Arduino UNO via Breadboard. The purpose of this Ultrasonic Sensor is to detect an object (in this case “feet”) within 20 cm distance from it.
Breadboard & Jumper Wires:
Breadboard is a fundamental piece of equipment in order to build a circuit. Breadboard has power lines with an indication of “+” / “-”. Power supply is connected to the power line with the help of jumper wires.

There are component lines perpendicular to the power lines where we can connect components such as microcontroller, bulb etc. Breadboard creates the circuit connection between all the other components.
Arduino UNO:
Arduino Uno is a microcontroller electronic prototyping board based on the ATmega328P. It consists of a physical programmable circuit board and a piece of software. It has the following components – 14 digital input/output pins, 6 analog inputs, 16 MHz ceramic resonator (CSTCE16M0V53-R0), USB connection, Power jack, ICSP header, Reset button. It can be programmed with Arduino IDE. This IDE uses a simplified version of C++ programming language.

This microcontroller is the brain of this operation. It takes the data from the Ultrasonic Sensor and calculates the distance between the feet and the sensor to determine if the servo motor should be triggered.
Servo Motor:
It’s a motor that produces motion when it is triggered by a command then regulates the speed and direction of that motion in response to feedback.

Servo motor takes command from the Arduino UNO regarding rotation with parameters such as speed, time which will help opening the door. The motor shown in the figure is very small scale and the one fitted in the final product will be much more robust to fit the needs of the customer. The mechanism when not activated will be completely inactive and will let the door function normally in case power is out or someone chooses to not use the mechanism. The motor will operate at a steady speed so that opening is predictable and safe. The motor will also disengage if something is obstructing the door to avoid damage to the mechanism or to anything on the other side of the door.
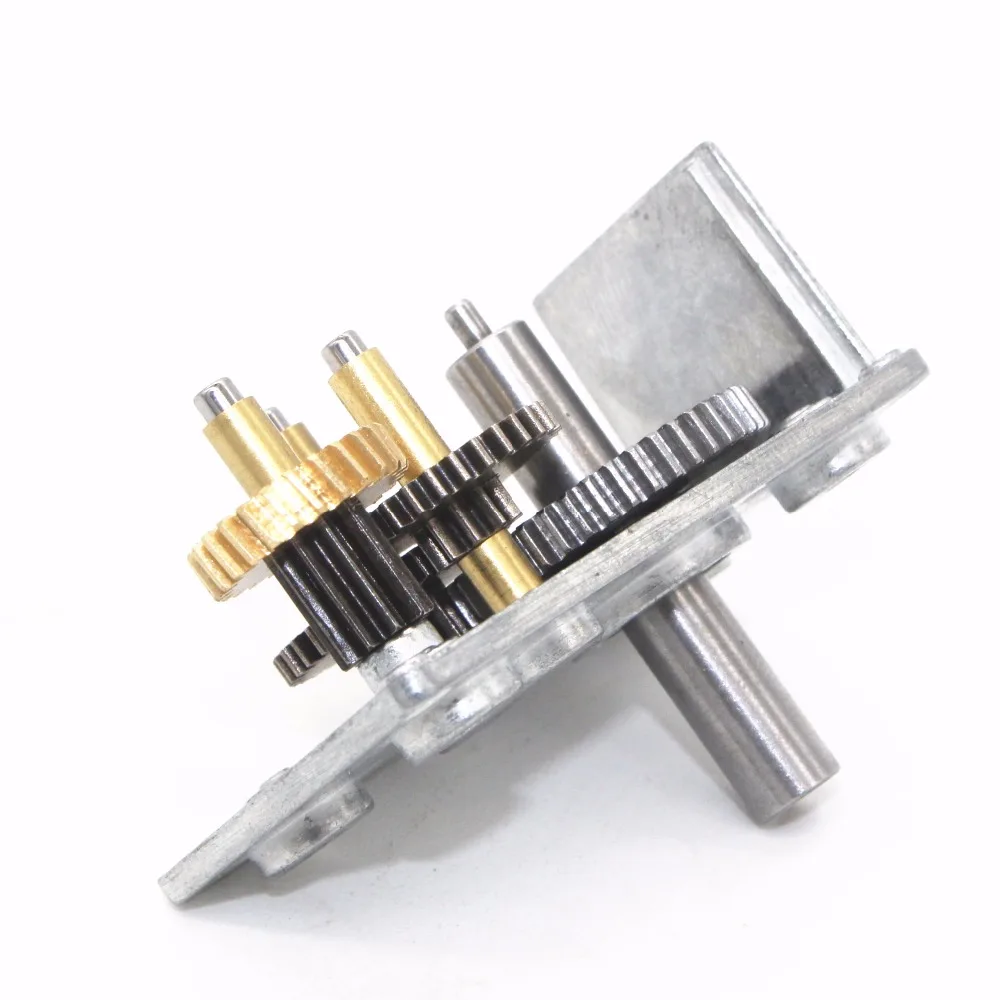
Gearbox:
The gearbox’s main function is to route the torque produced by the motor to the lever that will be opening the door. The gearbox will have the right ratio to ensure reasonable opening time as well as the force that is exerted on the door.

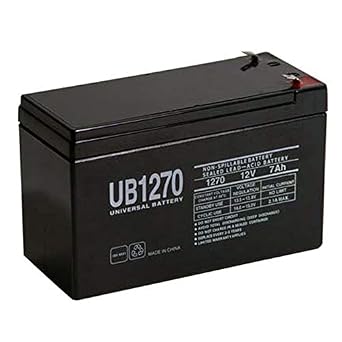
12v Battery:
The 12v battery will ideally be able to last about a year before needing to be charged/replaced and be resistance to different conditions as this could be place close to an outdoor setting.

Door mount/casing:
The main casing is what will be seen on the exterior and holding the motor, breadboard, arduino uno, gearbox and battery. The lever which will be the opening the door is attached to the bottom of the casing allowing the case to be mounted on the top of the door frame as shown in figure 7. The main construction of the case will be sturdy plastic in order keep costs low. The exterior will be sealed to be waterproof since the motor might be used close to the outdoors.

The lever will be contracted of strong stainless steel to prevent short-term rust and ensure durability. The case will have the option to be mounted by use of screw/nails or to be mounted onto brackets. The case will also hold the wired receiver that will communicated with the two sensors.
Door Opening Mechanism:

System Block Diagram:

Control Flow Diagram:

Processes
Brief Description:
We are designing an automated door opener to allow people to go in or out through doorways without actually touching any part of the door. There are select items that are essential to make this process come to life. We will be using 2 Ultrasonic Sensor HC-SR04, 2 Breadboard & Jumper Wires, 1 Servo Motor, 1 Power Source (12v Battery), 1 Gear Box, 1 Door Mount/Casing and 1 Arduino UNO. These are the key components to make it interactive with the user.
How Does It Work:
The ideal position for the automated door opener is in public restrooms. As a person approaches the door it would activate the sensors and generate power to the servo motor, where it would create a calm and clear path for the user to freely enter the room without touching the door. The door will be able to open entering the bathroom and exiting the bathroom.
Prices of All Components:

Price of Labor and Installation:
We would need an electrician for the installation aspect of it. The average hourly wage for an electrician is approximately $45.00. Installation for the automated door opener can range from 1.5-3.5 hours. Plus, the price of the components being used will be $520.00. All together the installation and labor price can be from $590.00 to $680.00.
Conclusion:
The automated door opener is a reasonable solution to the problem posed by the pandemic. By eliminating a common source of transmission, public doors, it allows for safer access to public areas. These include restrooms, office buildings, hotels, anything that would have frequent public foot traffic.
Image Sources:
Figure 1: https://cdn.sparkfun.com//assets/parts/1/3/5/0/8/15569-Ultrasonic_Distance_Sensor_-_HC-SR04-01a.jpg
Figure 2: https://cdn.sparkfun.com/r/600-600/assets/d/c/a/b/4/513a1dface395fa524000001.JPG
Figure 3: https://i.ebayimg.com/images/g/~hEAAOSwbtVZUykL/s-l500.jpg
Figure 5: https://ae01.alicdn.com/kf/HTB16LalbFmWBuNjSspdq6zugXXaB.jpg
Figure 6: https://images-na.ssl-images-amazon.com/images/I/41wiM2V4utL._SX342_.jpg

This entry is licensed under a Creative Commons CC0 1.0 Universal Public Domain Dedication license.